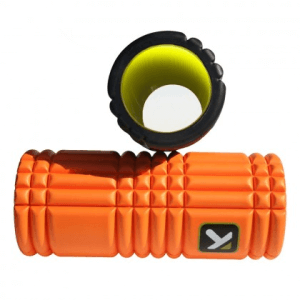
On a Roll! – The Benefits and Advantages of Self Myofascial Release
Our muscles need to not only be strong, but flexible and pliable as well. We all know that uncomfortable feeling of a tight hamstring, sore oblique or an overworked and constricting hip flexor. Self myofascial release with a foam roller is a technique you can use daily that will help you work out those tight areas; providing better muscle elasticity and higher performance.
The Science Behind it All
Myofascia (or fascia) is a dense and highly flexible tissue that surrounds and covers all of your muscles. Think of it as a spider web that has no beginning and no end that protects every inch of muscle in your body. Fascia assists your muscles in dealing with heavy workloads, stress and injuries.
Myofascia’s response to exercise is similar to that of your muscles’; it lengthens, shortens, and can become knotted and tight due to repetition and overuse. The uncomfortable sensation of an overly tight or overused muscle is also caused by knotted and tight fascia. When fascia is damaged, either due to lack of flexibility training or overuse, it can cause multiple problems such as muscle spasms, headache, numbness and even further reduced muscle flexibility.
Exercise and lack of flexibility training aren’t the only actions that causes fascia to become damaged and tight. Other lifestyle activities (either voluntary or involuntary) can also cause damage to this important tissue. Poor posture, prolonged sitting or standing, accidents that cause muscle trauma like a fall or car accident, and chronic stress can all contribute to uncomfortable, tight and knotted fascia.
Time to Roll it Out!
By using a foam roller you can release a lot of the knots and uncomfortable pressure from tight fascia on your own. Bottom line, foam rolling is a beneficial, cheap and super effective method of self-massage! If performed properly and consistently, incorporating foam rolling into your exercise regimen will produce a multitude of health benefits; such as:
- decrease in knots
- decrease in muscle pain
- improved flexibility
- improved range of motion
- improved circulation
- increased blood flow
- improved spinal alignment and posture
- better body awareness
The Moves
Here are six simple and easy lower body foam rolling moves that you can incorporate into your exercise routine. Try and do these moves at least 3 times/week; preferably after exercise when your muscles are warm. Do each move for at least one minute, slowly rolling back and forth on the roller. They key is to spend the most time on your tightest areas. Once you become familiar with the roller, you will become more aware of the small intricacies of your muscles; allowing you to focus on what areas need to be worked more than others. The first few times you foam roll it may feel awkward and uncomfortable. This is normal! The more you roll, the more comfortable you will get with the process and the more your fascia will thank you! 🙂
- Hamstrings – Sitting on the floor, place the roller under your thighs. Carefully roll from the back of your knee up to your buttocks and back down again. For a deeper tissue release and increased pressure, work one hamstring at a time by stacking your feet and allowing the roller to press deeper into your hamstring. Work each leg for one minute paying special attention to tight and tender areas.
- Calves – Sitting on the floor, place the roller under one calf. Rest your other foot on the floor. Roll from your ankle to below the knee and back again. Rotate the roller and your calf by turning inward and outward as well as up and down. Get comfortable with the movements and spend one minute on each calf. If needed, stack your feet for more pressure.
- Quadriceps – Lie on your stomach with the roller placed under the front of one of your thighs. Use your arms for balance, lift your core and slowly roll up and down from the top of your knee to the bottom of your hip. Work one quadricep at a time for one minute; stopping to apply pressure to tender and sore areas. You will be surprised by how tight your quads really are!
- Adductors (inner thighs) – Lie on your stomach with one leg extended to the side, keeping the knee slightly bent. Place the roller in the groin area of the extended leg and roll out your inner thigh, using your arms for balance. Pay particular attention to tight areas and roll out any knots you may feel. Work each leg for one minute.
- Abductors (outer thighs) – Lie on your side and place the roller under your outer thigh. Rest your opposite leg on the floor in front of you and use your arm to pull your core up off the floor. Roll along your outer thigh, increasing pressure by playing around with the placement of your resting leg. Roll each leg for one minute.
- Buttocks – Sit directly on the roller and extend one leg in front of you. Place your foot from the opposite leg on the extended leg’s knee. Lean into your buttocks muscle by using your arms for balance. Roll back and forth on the buttocks working out any kinks; using your extended leg to control the pressure. Work one side of the buttocks for one minute and then switch to work the other.
We love to hear feedback from our readers and want to know how these foam rolling moves worked for you! Try and incorporate these moves into your flexibility training/workout routine and comment below with your results. Until then, happy rolling!!!
Related: Exercise Efficiency: More for Less

